Showing posts with label Altered Art. Show all posts

Friday, 14 February 2014

Happy Valentines

 
Here is a very quick idea for Valentines Day, a gorgeous linen heart that looks all hand sewn but in fact only has two rows of running stitch to hold it all together.
I used the stamp that came with the latest Docrafts grab bag, the stamp is called Sew Lovely, it can also be bought on it's own.
 I stamped the image twice onto some linen I had using Very Cherry Stazon ink, cut out the stamped images and some wadding in the shape of a heart then carefully did running stitch just outside the stamped stitches, I used cotton that matched the linen as I did not want it to be seen too much.
To finish the heart off I added the flower button, I actually put one each side of the heart.
I am now going to spray the heart in my favourite perfume, if I had thought ahead I would have put essential oils onto the wadding before I sewed the heart, next time!!!


Saturday, 26 October 2013

Bird House


 I have had this bird house for so long, I knew what I wanted to do with it but just never got round to doing it!!! Then a good friend told me she was moving and bingo, this house was decorated just like that!! She will love it as a new home gift.
 The house started off as bare wood, I inked every edge with Walnut Stain Distress Ink, then started to add the paper
I used a hot glue gun to attach the ribbon to the roof top.
 I inked round the paper edges too before I glued them to the house.
 The roof is made of scrap card and paper I had which I put through my scallop edge punch, then layered up to like roof tiles.
The bird on the front is punched out in white card, using a stampin up punch that I managed to borrow, then I inked the bird in  colours to match his house.
The finishing touched were glitter glue and glossy accents.


Thursday, 8 August 2013

Name Plaque

I made this name plaque for my niece, can you guess her name?
She loves Mini Mouse, I much prefer Donald Duck!!!
The end result looks very vintagey, is that a word? Poppy loved it and is putting it on her wall when her bedroom has been decorated.
I used my cricut to cut out Mini Mouse and the letters, punches for the flowers, recycled tissue paper, stickles, distress ink, gilding flakes, glossy accents and varnish.
 I started off with a blank bit of MDF, my fantastic hubby found these at work, they were going to be thrown out so thinking of me he brought them home, aren't I lucky? I sanded it down and covered it with cream acrylic paint.
I added gilding flakes around the four edges, not sure what colour they are but they had different gold tones in them.
I then attached torn spotted tissue paper to the front. On the back I put cream card stock.
I added Mini Mouse, Poppy's name and the flowers I had made, Mini Mouse has black stickles on her nose, tail and outlining her ears. I filled the bow in with glossy accents then added stardust stickles to the flower centres.
To finish off I added a brown distress ink to certain parts of the plaque front, then thinly varnished the whole thing.
I am so pleased with the end result, but I did run out of time to make Poppy a birthday card, so I wrote on the back of this lol!!!


Thursday, 13 June 2013

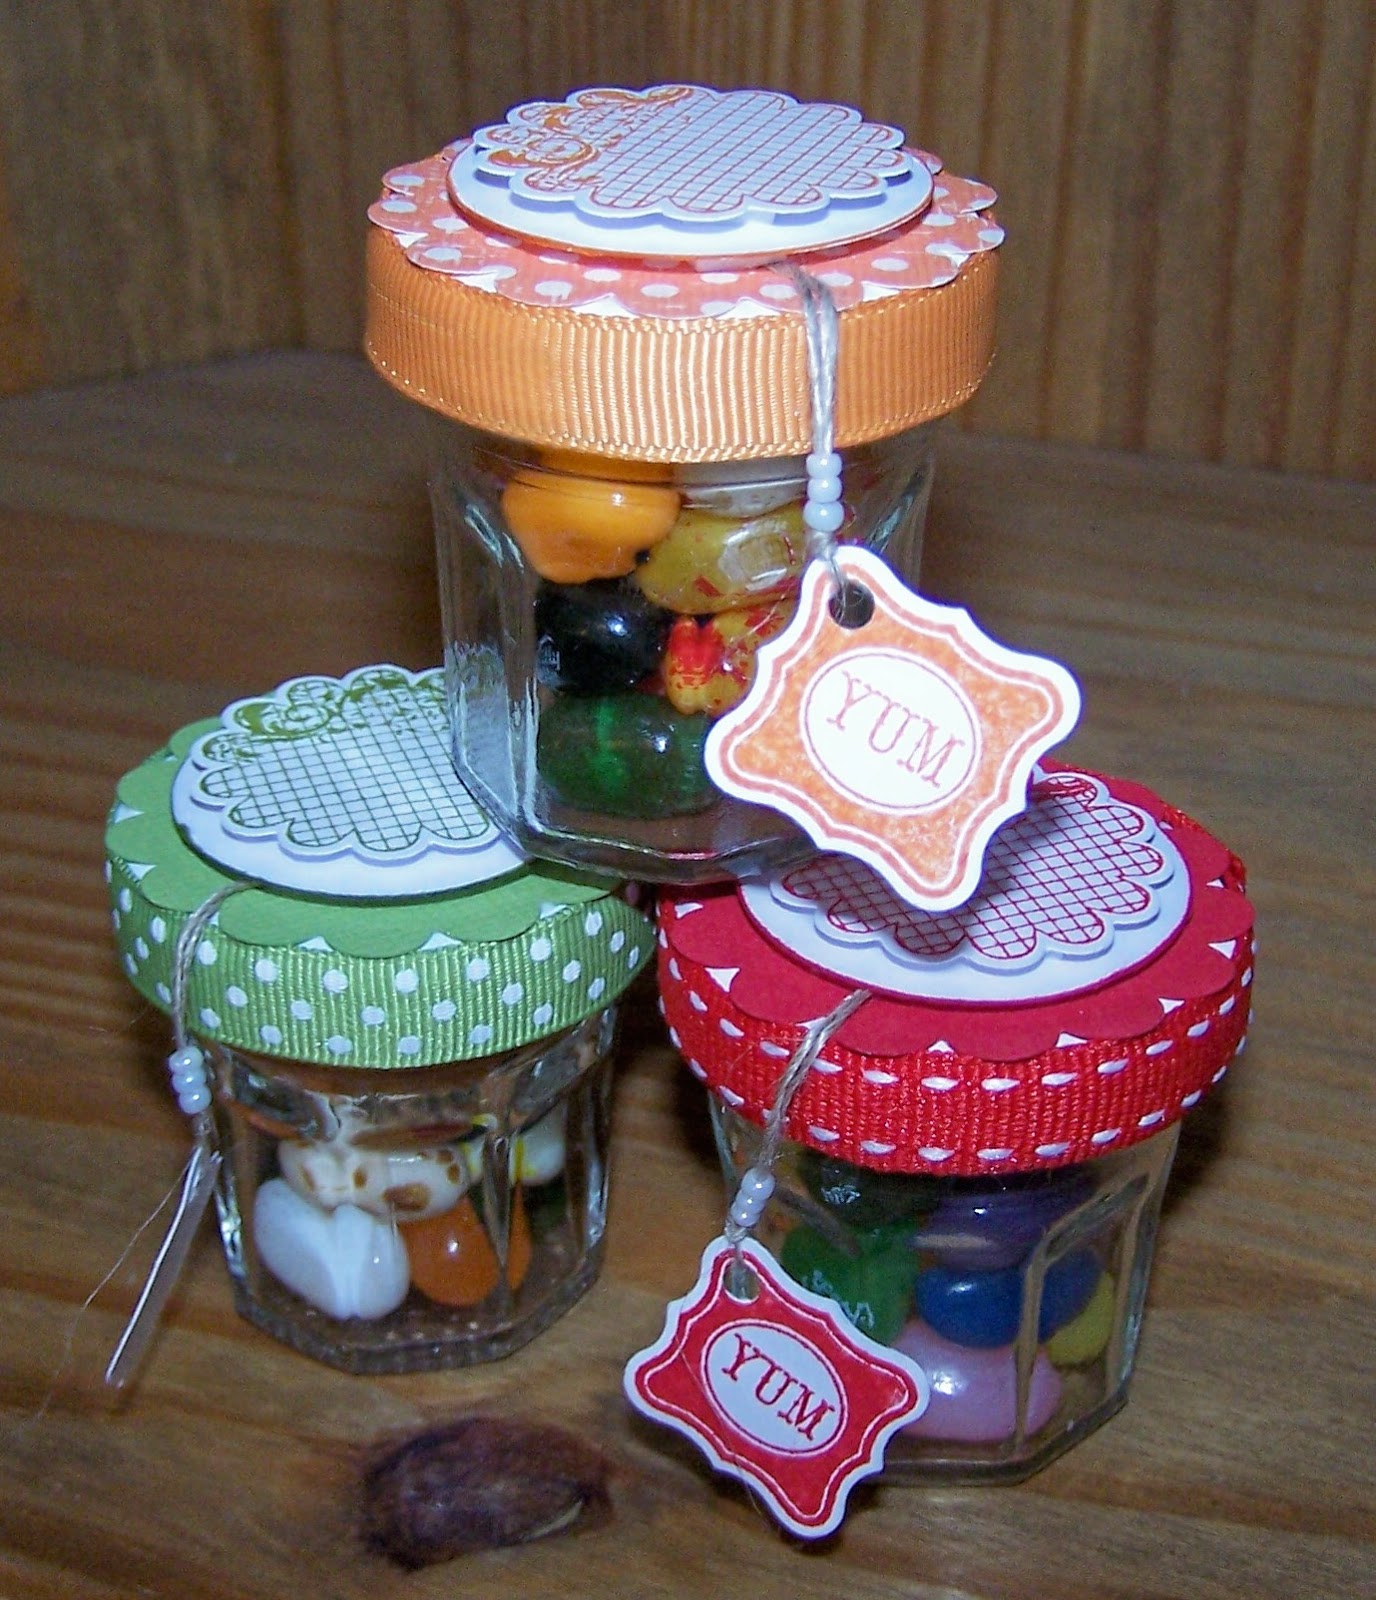
Jelly Bean Jars

I love collecting (my family say hoarding) mini jars etc that I can use for all sorts of things.
I have made these for Father's Day gifts, not enough sweets to get fat on but just enough to satisfy the need for sugar!!
 I started by attaching white circles to the lids, then glued coordinating ribbon around the edge of the lids, which I then topped with a scallop circle. To this I added another white circle which I inked around and a stamped smaller scallop circle.
I stamped and punched out the yum tag and pushed the thread under the topper, what I should have done was attach the tag to the topper then put the topper on the lid..............next time!!
All the stamps and punches I have used are from stampin up.
Finally I filled the jars with yummy jelly beans.
Hope they like them!!

Wednesday, 26 September 2012

Chocolate Pencils

The children have now been back at school for three weeks, so I thought I would show you these pencils I made during the holidays using Rolo's and Hershy's Kisses, I saw the idea on a blog called 'inking idaho'.

 I cut yellow card the length of a pack of Rolo's and wide enough to go round with a spare bit for the double sided tape, then I scored long ways every 1/4 inch. I put red tape along the spare bit of card and wrapped the whole thing around the Rolo's. the 'rubber' is made with pink and silver card just wrapped around the top of the pencil and attached with red tape.
The pencil point is the Hershy's Kiss, stuck on with a glue dot, at the time I made these Asda had lots of American sweets on offer, so it worked out that I paid £1.50 for a pack of about 25 Kisses. Apparently the 99p Stores sometimes have the Kisses but not when I looked!!!
As you can also see I made a pencil from a tube of smarties as well, but I think the Rolo's work best.
Next time I make some of these I might add black lines down the pencils, just like the ones we have in our school.

Thursday, 25 August 2011

Love


Lucy has recently celebrated her birthday, she had a great time and her birthday was spread over a week as we went away the day before her actual birthday.
One of Lucy's presents was this love ornament. Lucy painted it blue then added her friend's names, I had to giggle to myself as when she added her boyfriend's name she attached it using magnetic tape just in case she goes off him, what a girl!!

The pink dots are candy from Craftwork Cards, Lucy added glitter to them to make them sparkle in her room. The lettering was cut using my old sizzix machine and the girls are weird font set.

Lucy is very pleased with how this project turned out, so as well as decopatching everything she will also be altering lots of things. Hope our cat can run fast as Lucy has always wanted a ginger cat.