Friday, 16 December 2011

After Eight Box

This delightful little box holds five After Eight chocolates, just the right amount for a chocolate fix!!
To make the box I started by measuring the size of an After Eight, then eating it, then I decided how many chocs I wanted the box to hold, ate a few more then made the box.
I have covered my box using Basic Gray paper, I know the paper is old stock but I love it.
The stamp I used is from Stampin up.
You can see from the picture that the flap slides behind the raised stamped scalloped oval to stay closed.
I managed to make several of these little boxes but only one ended up with After Eights in, I'm now looking for BOGOF's at the shops, and I wonder why my clothes are getting tighter!!

Thursday, 15 December 2011

Tree Decorations

I have just realised that I have not posted on my blog for over two weeks, I am very sorry but hope the next few posts make up for it.
I made 24 of thse mini triangle boxes to hang on my christmas tree but I think they look better on this tree, which my friends Ann and Ellie bought me for christmas two years ago.
 The christmas puddings are made from one brown circle and a pearlesent (? sorry my spelling is really bad at the mo.) cream semi circle for the custard. The holly are sequins that I purchased from my local supermarket.
 I tied the boxes together with red ribbon then threaded gold thread through for the hanger, this is when I also added the bell, I wanted to buy the papermania ones I had seen but when I went looking everywhere had sold out so I bought hobbycraft own make and I must say I am very impressed with them, I got more for less!!
If you wanted to make these into advent boxes you could add the numbers onto the reverse of the box.

Tuesday, 29 November 2011

Birthday Card

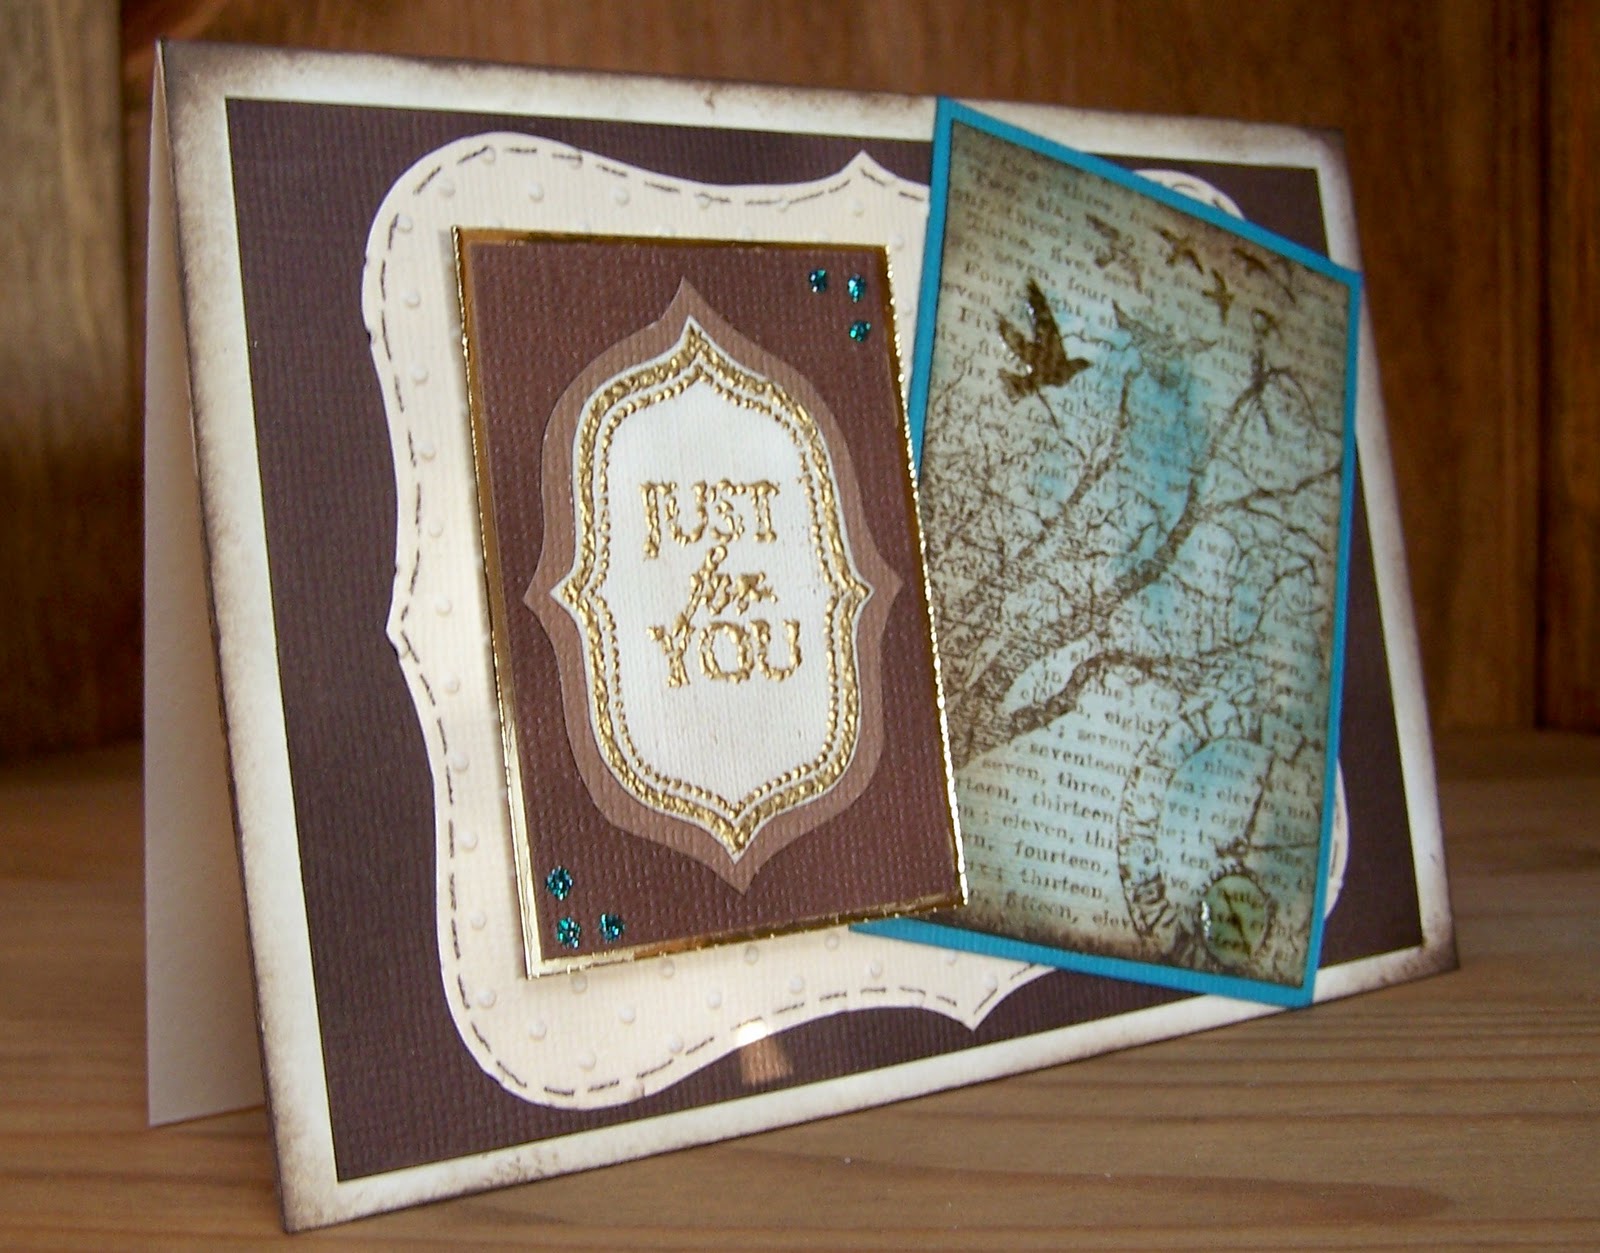
This card is one I made for my Dad's birthday.
I stamped the image onto linen card, I really like the effect it gives. I've then inked around the edges and added colour to the middle of the image.
Glossy accents have been added to highlight parts of the stamped image.
I hand cut the top-note shape then embossed it using cuttlebugs swiss dots, faux stitching was then added.
The 'just for you' was stamped using embossing ink then heat embossed with gold.After I put the card together I used walnut stain DI to go around the edges of the card base.
When I stood the card up it lacked something, this was when I decideded to add the three gems in two of the corners.

Friday, 25 November 2011

Key Card

I am so pleased at how this card turned out,
It has 'real' stitching on it, not the usual faux stitching I normally add, distress inks, glossy accents, glitter and a punched edge.
I bought the stamp from Karen at 'Craftbuddies' as I love keys, it was only £1.99 and worth every penny.
I started by stamping the image onto linen cardstock as I wanted an aged feel to the actual card.
I then inked up the card and put it to one side to dry.
This is when ,while waiting for it to dry (I didn't even think to use my heat gun) that I decided to add real stitching to the card.
AfterI matted the card front onto red card, I wrapped some of the thread around the bottom of the card, then attached it to the stitched panel.
I layered two punched edges, offset, to the right hand side of a card base. Next I attached the card front to the card base.
The finishing touch was to add glossy accents and glitter to the stamped keys, I used Stickles rock candy.
As it was Karen's birthday I  added the vellum happy birthday.
Next time I make this card and I will, I plan to add a key from a Primark necklace which was full of keys for only £4.

Monday, 21 November 2011

Friend Card

 I love how this card looks and the friend who it was for still has it out.
The stamps are from 'Stampin up', the inks are DI, shabby shutters and spiced marmalade all layered onto Bazzill swiss dots cardstock.
I finished the card by adding faux stitching and inking around the card base.
The 'F' for friends is a mix of the two inks used, one of those happy mistakes that I make so often.
I love the way the flower looks and stands out on the card.
This is the ideal card just to let someone know they are special.


Thursday, 17 November 2011

Easel Thank You Card

 This card is the class from September at Tithe Barn, some of our ladies wanted to know how to make a triple easel card so I had a play around and this is the result.
The purple paper is glittered and looks amazing in the correct light, not in a photo taken at night with all the lights on!
The small butterflies are punched from my Martha Stewart punch, the larger ones are cut from the Tim Holtz butterfly movers and shakers die. The card base is a DL card that I have divided into three.
The 'thank you' stamp is one I have had for an eternity and use so often I'm surprised it continues to stamp sharpe images each time I use it.

Monday, 7 November 2011

Christmas Card

This is the class on Saturday 12th November at Tithe Barn, Horsford. The cost will be £2.00. We will be using alcohol inks, peel offs and glitter.

If you wish to take part in the class, please let Karen know over at Craft Buddies. Tools needed are; craft mat, cutting tool, glue or strong tape, also if you have a mat that you ink on and a Tim Holtz wooden handle thingy for the alcohol inks that would be helpful. I will provide the glitter, alcohol inks and everything else needed to complete this card.